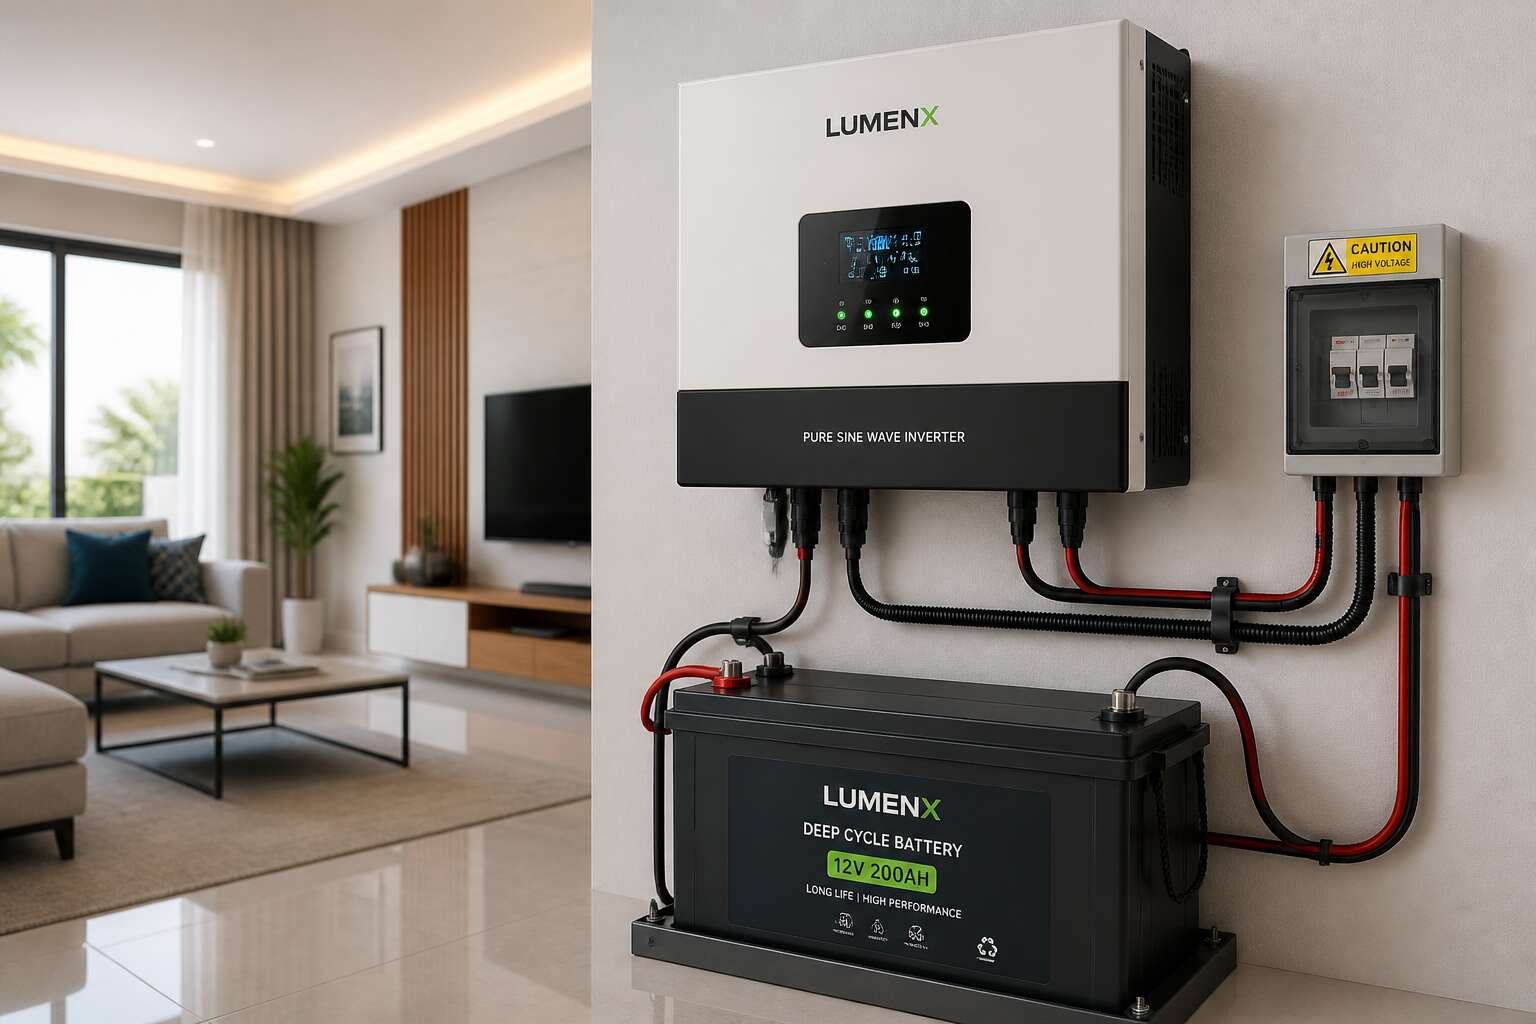
Understanding Home Inverter Battery Essentials
Why Battery Capacity and Power Ratings Matter
About 80% of South African households experience daily load shedding, yet most backups fail within the first hour. The culprit is rarely the inverter itself. More often, it is a fundamental misreading of what the batteries for home inverter can actually deliver.
Capacity and power are two separate currencies. Capacity, measured in amp hours or kilowatt hours, tells you the total energy stored. Think of it as a bank balance. Power, measured in watts, describes the rate at which that energy is released. The distinction matters because a battery might hold enough energy for six hours of gentle use, yet collapse in twenty minutes when the kettle and microwave demand their share simultaneously.
This voltage and capacity disconnect explains many disappointments. Lithium batteries handle deep discharges with composure, while sealed lead acid units prefer gentle treatment. The discharge rate influences this behaviour dramatically. A 100Ah battery rated for a 20 hour discharge may only provide 70% of that capacity when drained over three hours. Expecting peak performance in every scenario is a recipe for frustration.
The subtle art lies in matching the battery bank to the load profile. A sensible inverter system acknowledges that a 5kW inverter with a 2kWh battery is a mismatch, one that leaves appliances dark before the evening news finishes. The practical takeaway for any South African home is to list real devices and their wattages, not the sales brochure fantasies. An inverter system succeeds only when the batteries for home inverter align with the actual demands of the household.
Voltage, Amp-Hours, and Watt-Hours Explained
Voltage, amp hours, and watt hours form three specs you cannot ignore. Voltage is the electrical pressure pushing current through your wires. Amp hours measure charge quantity. Watt hours multiply the two to give actual usable energy.
Consider these numbers before you hand over your rand:
- Voltage determines system compatibility with your inverter.
- Amp hours tell you how long the battery can sustain a given current.
- Watt hours combine both for the true energy picture.
Many South Africans choose batteries for home inverter based on amp hours alone. A 12V 100Ah battery stores 1.2kWh. A 24V 100Ah battery stores 2.4kWh. Same amp hours, double the energy!
An inverter’s DC input voltage is stamped somewhere in its manual. Mismatched voltage means the inverter either refuses to start or dims your lights in protest.
Depth of Discharge and Its Impact on Performance
Here is an unsettling fact for many South Africans: discharging a standard lead-acid battery beyond 50% on a regular basis can cut its lifespan by more than half. This is the silent killer of backup power systems. Depth of discharge (DoD) measures how much stored energy you actually use before recharging. It is not a theoretical figure. It dictates how many load shedding cycles your bank will survive.
Most affordable batteries for home inverter setups are lead-acid. These units prefer shallow cycling. Draining them to 80% DoD forces chemical reactions that degrade the plates rapidly. Lithium iron phosphate (LiFePO4) chemistry, by contrast, tolerates 80% to 100% discharge without structural damage. The difference is stark:
- Lead-acid: 400 cycles at 50% DoD
- Lead-acid: 200 cycles at 80% DoD
- Lithium: 3000 cycles at 90% DoD
That cycle count translates directly into cost per winter of operation. An inverter might hum along happily, but the battery bank is the part that dies early. The inverter does not care about DoD, it only cares about voltage. Yet the battery does. Every time you drain it deeply, you sacrifice future capacity.
Choosing the right batteries for home inverter use means matching your daily energy needs against acceptable depth of discharge. A system designed around 50% DoD requires double the storage capacity of one built for 90% DoD. This initial cost shock surprises many buyers, but it protects your investment over the long haul.
Touring the Main Types of Inverter Batteries
Flooded Lead-Acid vs. Tubular Lead-Acid
Choosing the right energy storage is a significant decision for any South African household. With the prevalence of load shedding, understanding the differences between a flooded lead-acid and a tubular lead-acid battery is essential for getting the most value from your investment. While both are viable options for a batteries for home inverter setup, they serve different needs and budgets.
The flooded lead-acid battery is the traditional workhorse. It uses a liquid electrolyte that must be checked and topped up with distilled water regularly. These units are the most affordable upfront, making them an accessible entry point for basic backup power. However, they have a shorter lifespan, typically lasting between 3 to 5 years, and they are prone to sulfation if discharged deeply too often, which permanently reduces their capacity.
On the other hand, the tubular lead-acid battery represents a significant advancement in design. Here are the key distinctions:
– Construction: Tubular batteries use a positive plate shaped like tubes, which holds the active material more securely.
– Lifespan: They generally last 8 to 10 years, outperforming their flooded counterparts by a large margin.
– Deep Cycle Ability: They handle frequent and deeper discharges without suffering the same level of damage.
– Maintenance: While they also require water top-ups, the intervals are often longer than standard flooded batteries.
For homes that experience outages for long hours, the tubular design is the superior choice. Its robust structure prevents the active paste from shedding, which is a common failure point in flat-plate batteries. Although the initial price is higher, the longer service life often makes the cost per year of use lower than cheaper alternatives. This makes them a wise investment for a batteries for home inverter system where reliability is non-negotiable. Ultimately, your choice should align with your power needs and how often you expect to rely on the backup supply.
Lithium-Ion and LiFePO4 Advantages
In the shifting landscape of load shedding, lithium technology is no longer a luxury reserved for off-grid pioneers. It is a pragmatic response to the daily friction of power loss. Lithium-ion and its more stable sibling, LiFePO4, are rewriting the rules for what a batteries for home inverter system can deliver. The difference lies not in marketing, but in chemistry that offers a higher usable capacity without the penalty of damage.
Consider the practical advantages that separate these from their lead-acid predecessors:
– They endure thousands of cycles at a deep discharge of 80% or more, where lead-acid would degrade rapidly.
– They charge at a faster rate, capturing energy during brief load shedding windows.
– They require zero water top-ups and emit no fumes, offering placement flexibility without ventilation concerns.
Life expectancy is another domain where these excel. A quality LiFePO4 unit can operate for a decade or more, outliving the typical inverter itself. The financial calculus for a batteries for home inverter is then shifted, and the higher purchase price becomes a trade for reduced hassle and greater resilience.
Maintenance Requirements Across Battery Chemistries
In a country where load shedding is a recurring reality, the durability of your power backup hinges on the chemistry you choose. Maintenance requirements vary drastically between technologies, and understanding this can save you from unexpected failures during critical outages. Lead-acid variants, particularly flooded types, demand a disciplined routine; they require distilled water top-ups every few weeks and frequent terminal cleaning to prevent corrosive buildup. These tasks are not optional, as neglecting them prematurely kills the battery. Tubular options are sturdier, yet they still need periodic electrolyte checks and equalizing charges to balance cell voltages.
Thankfully, modern lithium batteries offer a reprieve from this constant vigilance. The maintenance story for these batteries for home inverter systems is remarkably simple. They require no watering, no acid handling, and no terminal scraping. Their Battery Management System (BMS) automatically balances individual cells and protects against overcharging or deep discharging. This self-governing function frees you from the weekly chore of inspecting fluid levels or worrying about gas emissions. For a homeowner, the practical difference is immense:
- Watering: Required monthly for lead-acid, never required for lithium.
- Ventilation: Essential for flooded batteries to disperse hydrogen gas, while lithium units operate sealed and safe indoors.
- Cycle Life: Lead-acid degrades with shallow discharges, whereas lithium maintains health through thousands of partial cycles.
Ultimately, the choice of battery dictates your ongoing effort level. While a traditional lead-acid bank can be economical upfront, it becomes a project that demands constant attention. In contrast, the lithium approach turns your inverter system into a silent, self-sufficient workhorse. When you evaluate the total cost of ownership, remember that your time has value too. The convenience of a zero-maintenance unit is a powerful argument for making the switch when purchasing your next set of batteries for home inverter use.
Lifespan and Warranty Comparisons
Stand before the battery racks at any South African supplier and the lifespan numbers tell a story that warranties often contradict. I have watched shoppers stare at these labels, weighing a five year design life against an eighteen month warranty. Tubular lead-acid units advertise the former, yet deliver the latter. Lithium iron phosphate alternatives claim a decade of service, with credible manufacturers backing them for five full years. The discrepancy deserves your attention.
– Flooded lead-acid: design life three to five years, warranty twelve months
– Tubular lead-acid: design life five to eight years, warranty eighteen to twenty four months
– Lithium LiFePO4: design life eight to ten years, warranty three to five years
When load shedding drags into its third year, these figures determine real costs. A set of batteries for home inverter use that fails at month twenty, just after the warranty expires, sends you back to the shop with a lighter wallet. A lithium unit, by contrast, may outlast two or three warranty cycles without complaint. The arithmetic favours modern chemistry. Choosing batteries for home inverter ultimately means reading the fine print, not the glossy brochure.
Selecting the Right Battery for Your Home Inverter
Calculating Your Load Demand and Desired Backup Time
Before you commit to any batteries for home inverter, calculate your household’s true energy appetite. A typical South African home consumes anywhere from 300Wh to 5kWh during load shedding, yet most owners guess. Guessing leads to either an undersized bank that dies by midnight or an oversized one that drains your budget.
Start by listing every appliance you intend to support. Write down its wattage, then multiply by the hours of daily use. Add all these watt-hour values together. Divide the total by your inverter’s efficiency factor, usually 0.85, to account for conversion losses. That figure is your required battery capacity.
- Refrigerator: 150W for 10 hours = 1500Wh
- LED lights: 50W for 6 hours = 300Wh
- Router and TV: 80W for 4 hours = 320Wh
Sum the numbers, then divide by your system voltage, such as 24V or 48V. The result is the amp-hour rating you need. Add a 20% buffer for unexpected surges. This simple process ensures your batteries for home inverter match your real-world load and backup duration without excess expense.
Matching Battery Bank Size to Inverter Rating
Matching your battery bank to your inverter’s rating is a hard rule, not a suggestion. Many homeowners install a 5kW inverter only to discover their batteries cannot deliver the surge current required to start a kettle or a geyser. The system trips, and the lights die anyway. The inverter’s capacity, measured in watts, tells you the maximum power it can convert. The battery bank’s capacity, measured in amp-hours, tells you how long it can sustain that conversion. These two numbers must align.
A common error involves the inverter’s surge rating. A device like a fridge can draw three times its running wattage for a few seconds. Your inverter must handle this spike, but your batteries bear the brunt of the instantaneous load. If your battery bank’s maximum discharge rate is lower than the inverter’s surge demand, the voltage collapses. You see the inverter display flicker, then it shuts down entirely.
Consider typical South African setups:
– 1kVA to 3kVA inverters pair well with 100Ah to 200Ah battery banks.
– 5kVA inverters usually require a minimum of 400Ah at 48V.
– Larger systems, above 8kVA, often need lithium batteries with high C-ratings.
You should verify the battery’s C-rate. This figure shows how quickly it can discharge without damage. A 100Ah lead-acid battery with a 0.5C rating delivers a continuous 50A. If your inverter demands 100A, you need a 200Ah bank. Lithium batteries handle 1C or higher, which is why they support larger inverters with smaller physical footprints.
Your inverter’s efficiency also affects the equation. A typical unit operates at 85% to 95% efficiency. The lost energy appears as heat, but it still draws from your batteries. For a 5kW load at 90% efficiency, the battery must supply roughly 5.5kW. Divide that by your system voltage, usually 48V, and you get a current draw of over 114A. This number dictates your battery’s required discharge capability.
The physical connection matters too. Using undersized cables between the battery and inverter creates voltage drop, which starves the inverter. Thick, short cables with proper lugs reduce resistance. Fuses or circuit breakers protect the wiring and the batteries from short circuits.
The safest approach is to list your inverter’s continuous and surge wattage, then multiply by 1.2 for safety margin. Compare this to the battery bank’s rated discharge current. If the numbers do not match, the system fails under pressure. A battery bank rated in Ah alone does not tell the full story. You need the voltage and the C-rate to confirm compatibility. Only then will the inverter and batteries work as one unit, delivering power when you need it most.
Balancing Upfront Price Against Long-Term Value
The cheapest batteries for home inverter systems often become the most expensive choice by year three. A 200Ah tubular lead-acid battery may cost R4,500, but its 700 cycles at 50% depth of discharge yield under two years of daily load shedding. Lithium iron phosphate costs three times more, yet delivers 5,000 cycles with deeper discharges.
Work out the rand-per-cycle figure before buying. Divide the battery price by the expected number of cycles under your usage pattern. Add replacement labour, disposal fees, and the irritation of another installation.
- Unit price of energy stored over lifetime
- Warranty coverage and claim process
- Performance degradation in high heat
A premium battery that survives fifteen years of Eskom’s load shedding transforms into the most economical option. That initial shock at the till fades once you measure value in decades, not discounts.
Checking Brand Reliability and After-Sales Support
Three years ago, I spent a full evening in darkness while a nearly new battery sat silent. I called the brand’s after-hours line expecting a machine. A human answered, then guided me through a quick voltage check with absolute calm. That one call revealed more than any spec sheet could.
Now I buy batteries for home inverter only after interrogating the after-sales process. Where does local stock actually live? Who signs the fault report? How long before someone measures a replacement, not a recording? The small print matters less than the response when things run wrong.
- The support line reaches a technician who knows the model, not a generic tour.
- Spare modules are stocked in your province, not ordered from abroad.
- The claim procedure names one responsible person with a direct number.
Every brand loves you before a problem surfaces. Reliability is measured in the minutes after you report one.
Installation, Safety, and Maintenance Best Practices
Step-by-Step Installation and Correct Wiring Methods
Electricians call a reversed battery terminal a learning moment, usually right before the sparks fly. For your batteries for home inverter, installation follows a simple ritual. Isolate the inverter. Connect positive to positive. Tighten every bolt with a torque wrench, not your optimistic forearm.
- Switch off all loads.
- Connect the positive cable first.
- Attach negative leads and then the fuse.
Ventilation is non negotiable. Lead acid batteries release hydrogen gas, so keep flames far away. Lithium types handle less drama, but they still need a correctly sized fuse. Every three months, inspect terminals for corrosion and loose lugs, especially after a heavy load shedding season. Safety here is not a suggestion, it is the invoice for your next system.
Ventilation, Placement, and Temperature Considerations
Placement determines how long your batteries for home inverter survive. High temperatures shorten service life. For every 10 degrees above 25°C, a lead acid bank can lose half its design life. In a South African garage, summer heat can exceed 40°C. Position the bank away from direct sun and walls that radiate afternoon warmth.
Ventilation needs differ by chemistry. Lead acid releases hydrogen during charging, and trapped gas creates an explosion risk. Lithium batteries are sealed but still require airflow. Follow these placement rules:
- Keep batteries upright and level on a non conductive surface.
- Leave at least 100 mm clearance around each unit.
- Mount the bank above floor level to avoid damp.
Temperature also governs charging voltage. A cold battery demands higher voltage; a hot one demands less. Without temperature compensation on your inverter, the bank overcharges in summer and undercharges in winter. Terminal heat should be checked with a thermal camera after heavy loads, and ventilation grilles need monthly clearing.
Routine Maintenance for Longer Battery Service Life
Most inverter battery failures trace back to installation shortcuts. Torque every terminal connection to the manufacturer’s specification. Loose lugs create resistance, which generates heat and melts posts. Tighten them twice, once after initial setup and again after 24 hours of cycling. Use only bare copper lugs, never solder, which can wick into the cable and cause embrittlement. A poorly crimped connection in a South African home is a fire waiting for load shedding.
Routine maintenance demystified. You do not need to be an electrical engineer to extend the service life of your batteries for home inverter.
- Check electrolyte levels monthly in flooded lead acid types and top up with distilled water only.
- Clean the tops of the batteries with a damp cloth to remove conductive dust and acid mist.
- Apply a thin layer of petroleum jelly to terminals to stop corrosion creeping up the posts.
Measure the specific gravity each quarter with a hydrometer for lead acid banks. Lithium systems require less physical upkeep, but inspect the battery management system’s reports for cell imbalance. A weak cell drags the whole bank down. Do not let dirt accumulate under the battery room door. The gritty dust that blows in with the Karoo wind settles on terminals and creates a slow discharge path. Your batteries for home inverter deserve a clean, dry environment.
Recognizing Common Warning Signs of Battery Failure
A faint sulfurous odor from the battery room often signals internal failure before voltage drop appears. Households relying on batteries for home inverter should heed this odor. Poor installation practices, like under-torqued connections or undersized cables, exacerbate this risk through corrosion and heat buildup.
Inspect safely. Wear gloves and goggles. Assume every terminal is live. Tighten loose connections only when the system is off.
Recognize these warning signs:
- Bulging or cracked cases
- White or blue crust on terminals
- Rapid voltage drop during discharge
- Excessive gassing in flooded cells
- Uneven charge across cells
A hydrometer reading varying by more than 0.05 between cells confirms a weak cell reducing the entire bank’s capacity. If any battery grows hot, disconnect it immediately; thermal runaway can ignite nearby materials. Regular maintenance, cleaning terminals and checking electrolyte levels, makes these abnormalities visible. Your batteries for home inverter will show distress. Treat them as data, not nuisances.
Safe Disposal and Recycling of Old Inverter Batteries
Installation demands respect for the chemistry inside. In South Africa, where load shedding cycles punish poor setups, the batteries for home inverter must sit on a level surface, away from moisture and direct sun. Use correctly rated cables and torque every connection to specification. A loose lug generates heat, and heat accelerates failure.
Safety begins with isolation. Switch off the entire system before touching terminals. Wear rubber gloves and protective eyewear. When handling old units, treat electrolyte spills as hazardous. Proper disposal matters because lead and sulphuric acid cannot enter landfill.
- Return spent batteries to certified recyclers.
- Never incinerate or puncture damaged cases.
- Store old units upright until collection.
Recycling recovers lead, plastic, and acid for reuse, reducing environmental harm and keeping your household compliant with local waste regulations.



0 Comments